
Appointments
Manage patient appointments, share a public booking link, and track appointment status and payments.
The Appointments page is where every patient appointment booked with your clinic's doctors is tracked, whether added manually by you or booked by a patient through your public booking link.
Searching And Filtering Appointments
The search bar lets you search by patient name, phone, or email.
Click Filters to open the Filters panel:
Click Apply Filters to apply, or Reset to clear all filters.
You can also control how many appointments are shown per page, and use the refresh icon to reload the list.
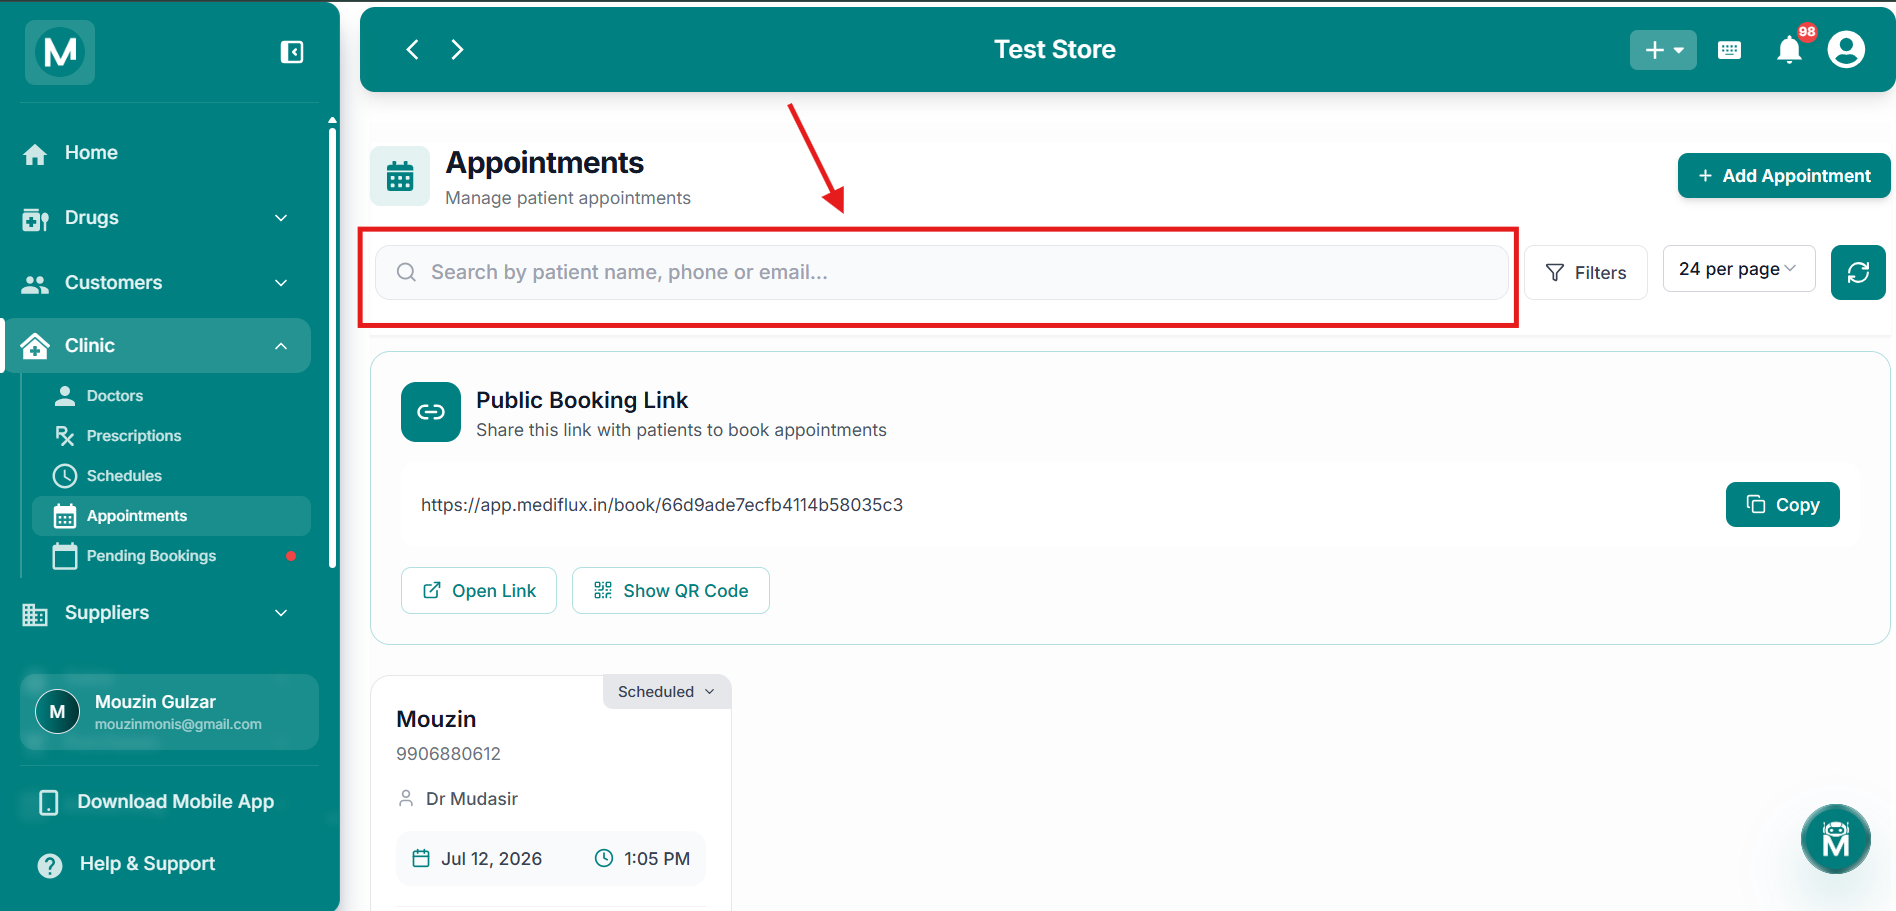
Search bar and Filters
Search appointments by patient details and apply multiple filters
Public Booking Link
Below the search bar, MediFlux gives you a Public Booking Link, a link you can share with patients so they can book appointments themselves, without you needing to add them manually.
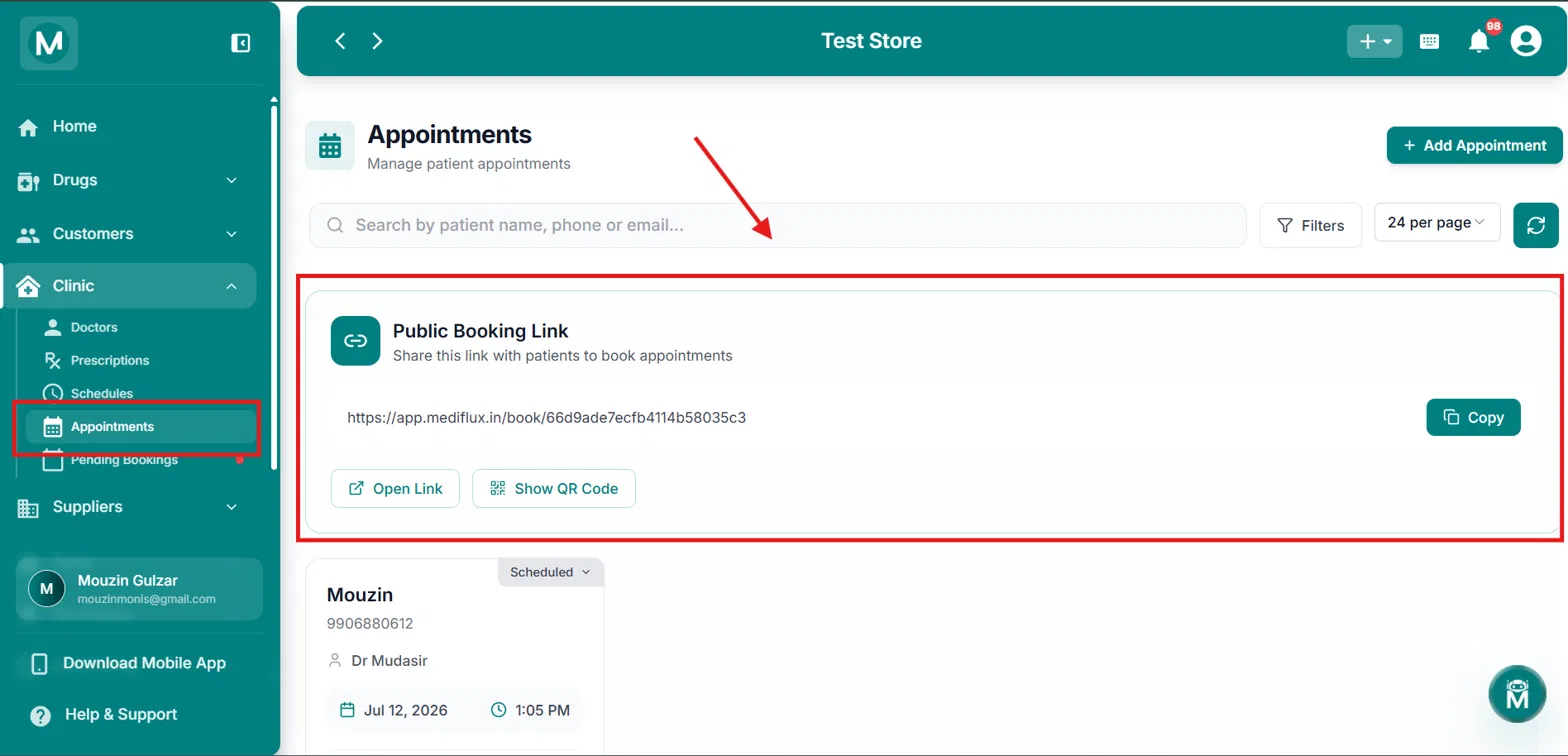
Public Booking Link
Copy, open, or generate a QR code for your public booking link
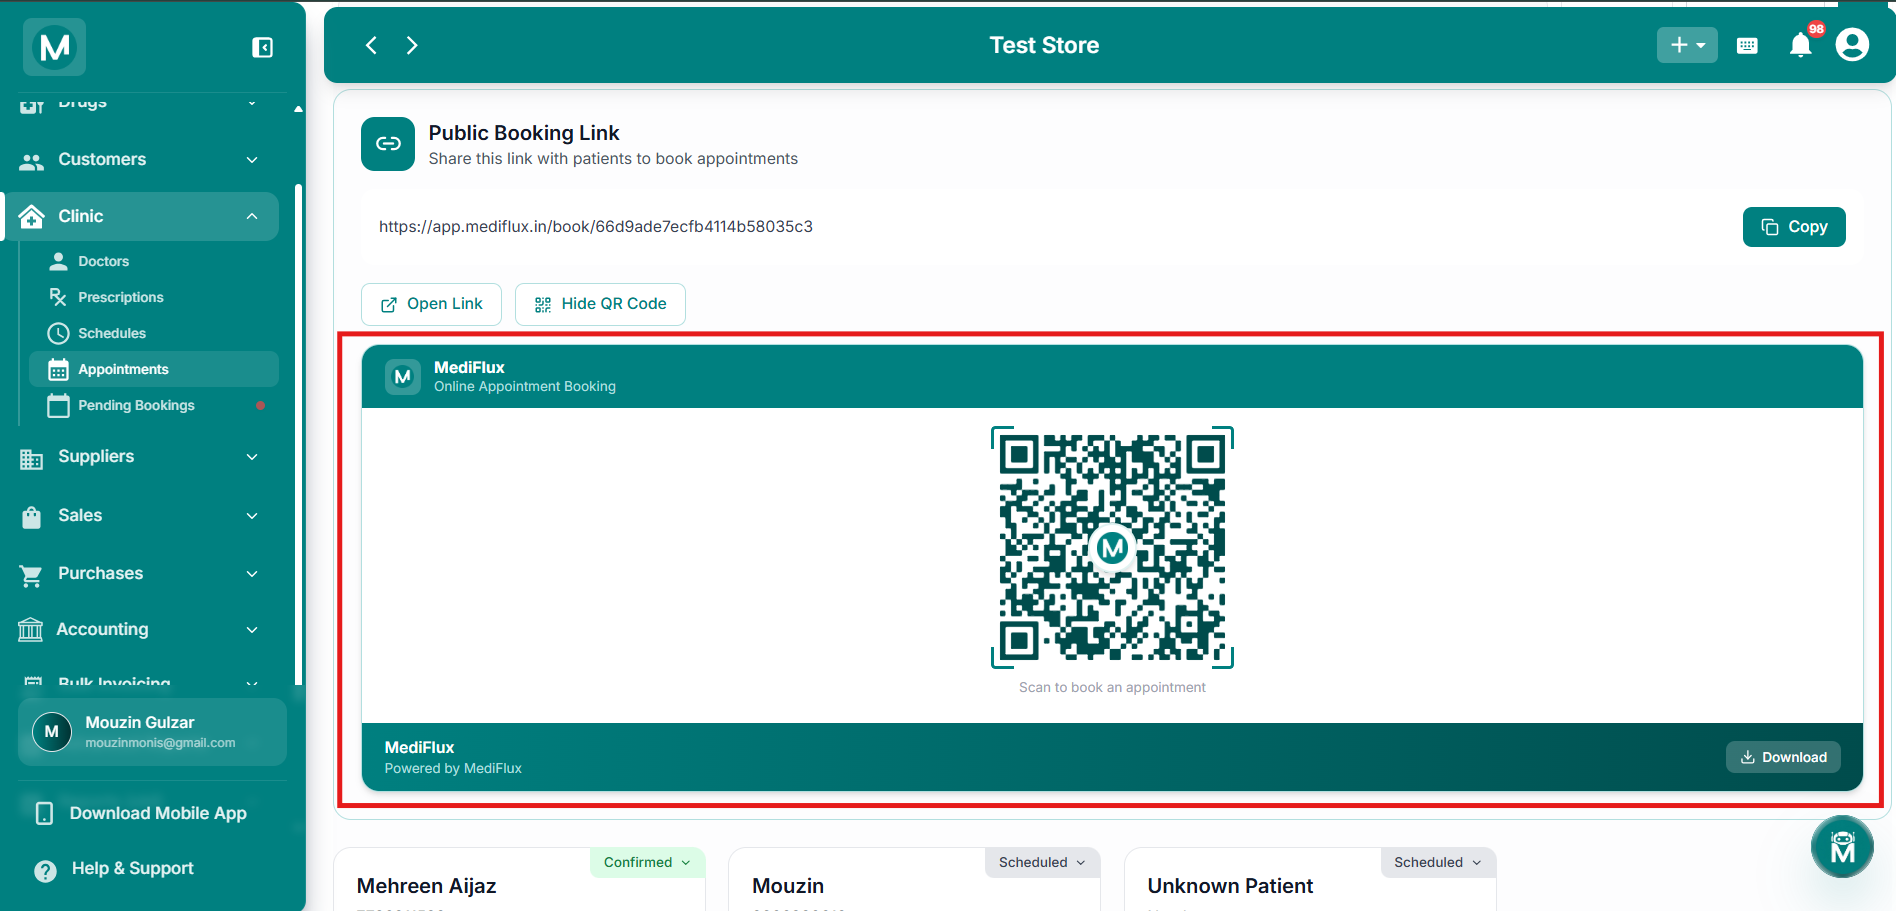
QR Code view
Scannable QR code that patients can use to book appointments
Adding An Appointment
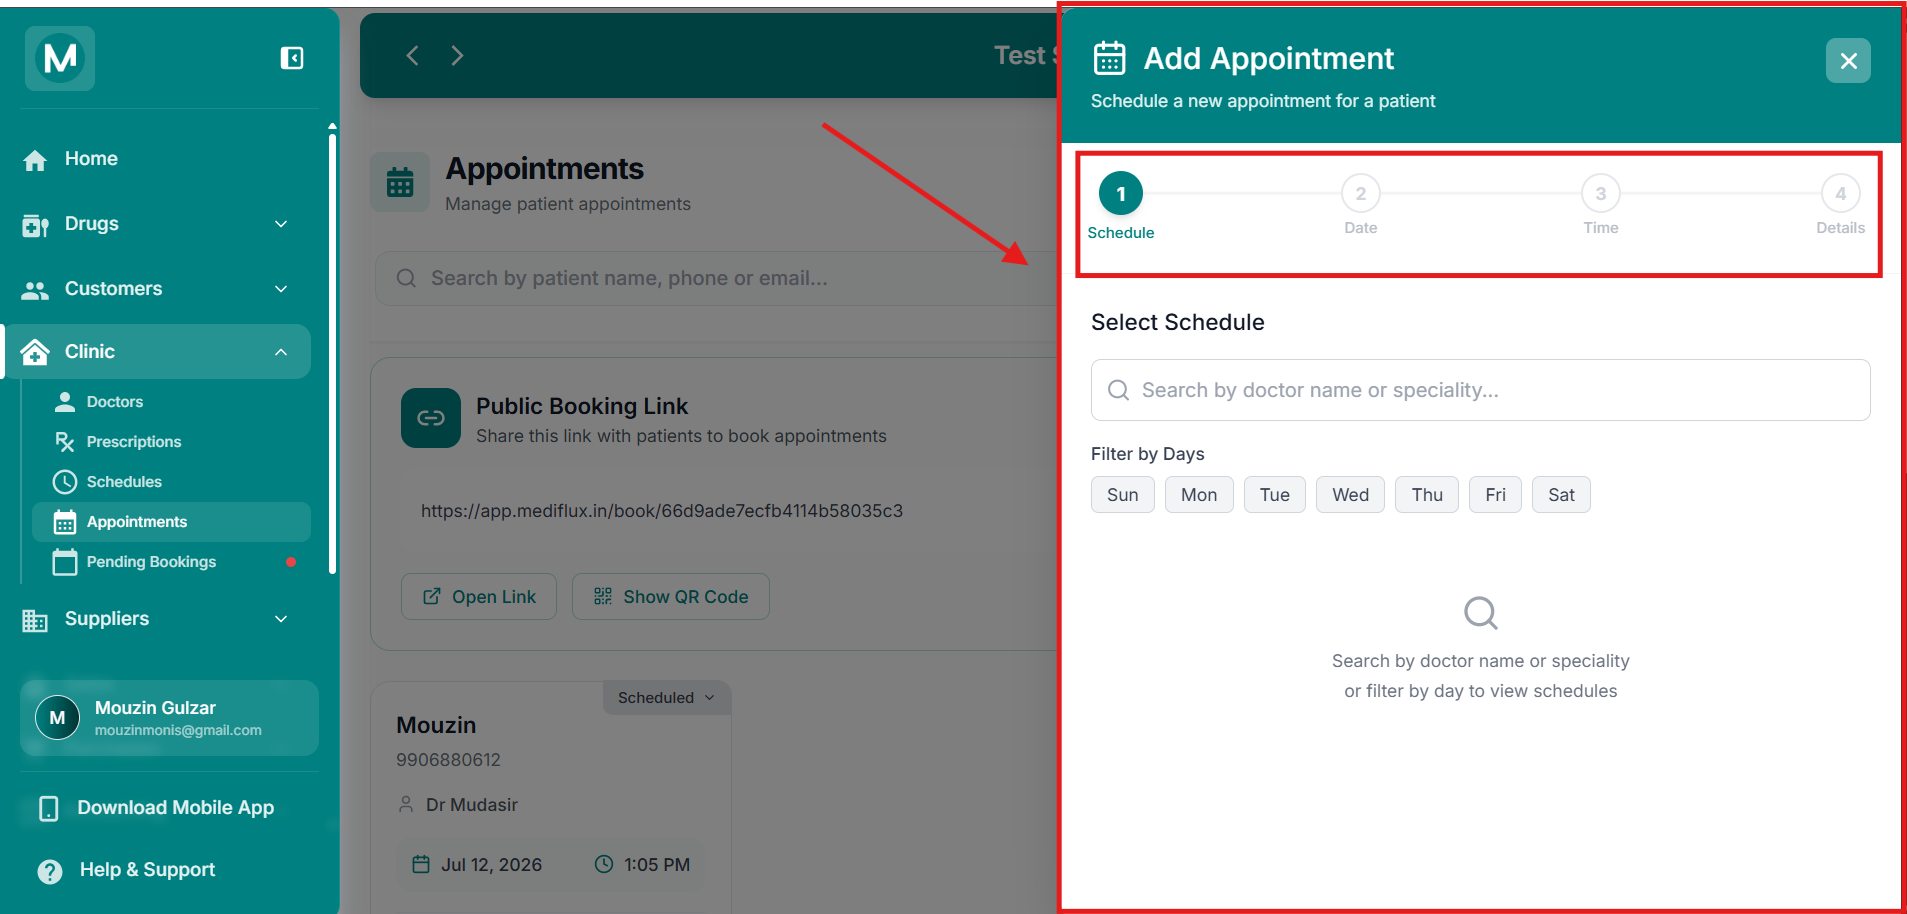
Click + Add Appointment to open a 4-step form:
Add Appointment button
Button to start creating a new appointment
Schedule
Search by doctor name or speciality, or use Filter by Days to narrow doctors down by their available days. Only doctors with a matching schedule are shown, along with their available days and consultation fee.
Date
Select an appointment date from the calendar. Only dates matching the selected doctor's available days can be chosen.
Time
Select an available time slot for the chosen date. Each slot shows its start and end time.
Details
Click Create Appointment to save, or Cancel to discard.
Add Appointment form
4-step form for creating a new appointment with schedule, date, time, and patient details
Appointment Cards
Once created, each appointment appears as a card with:
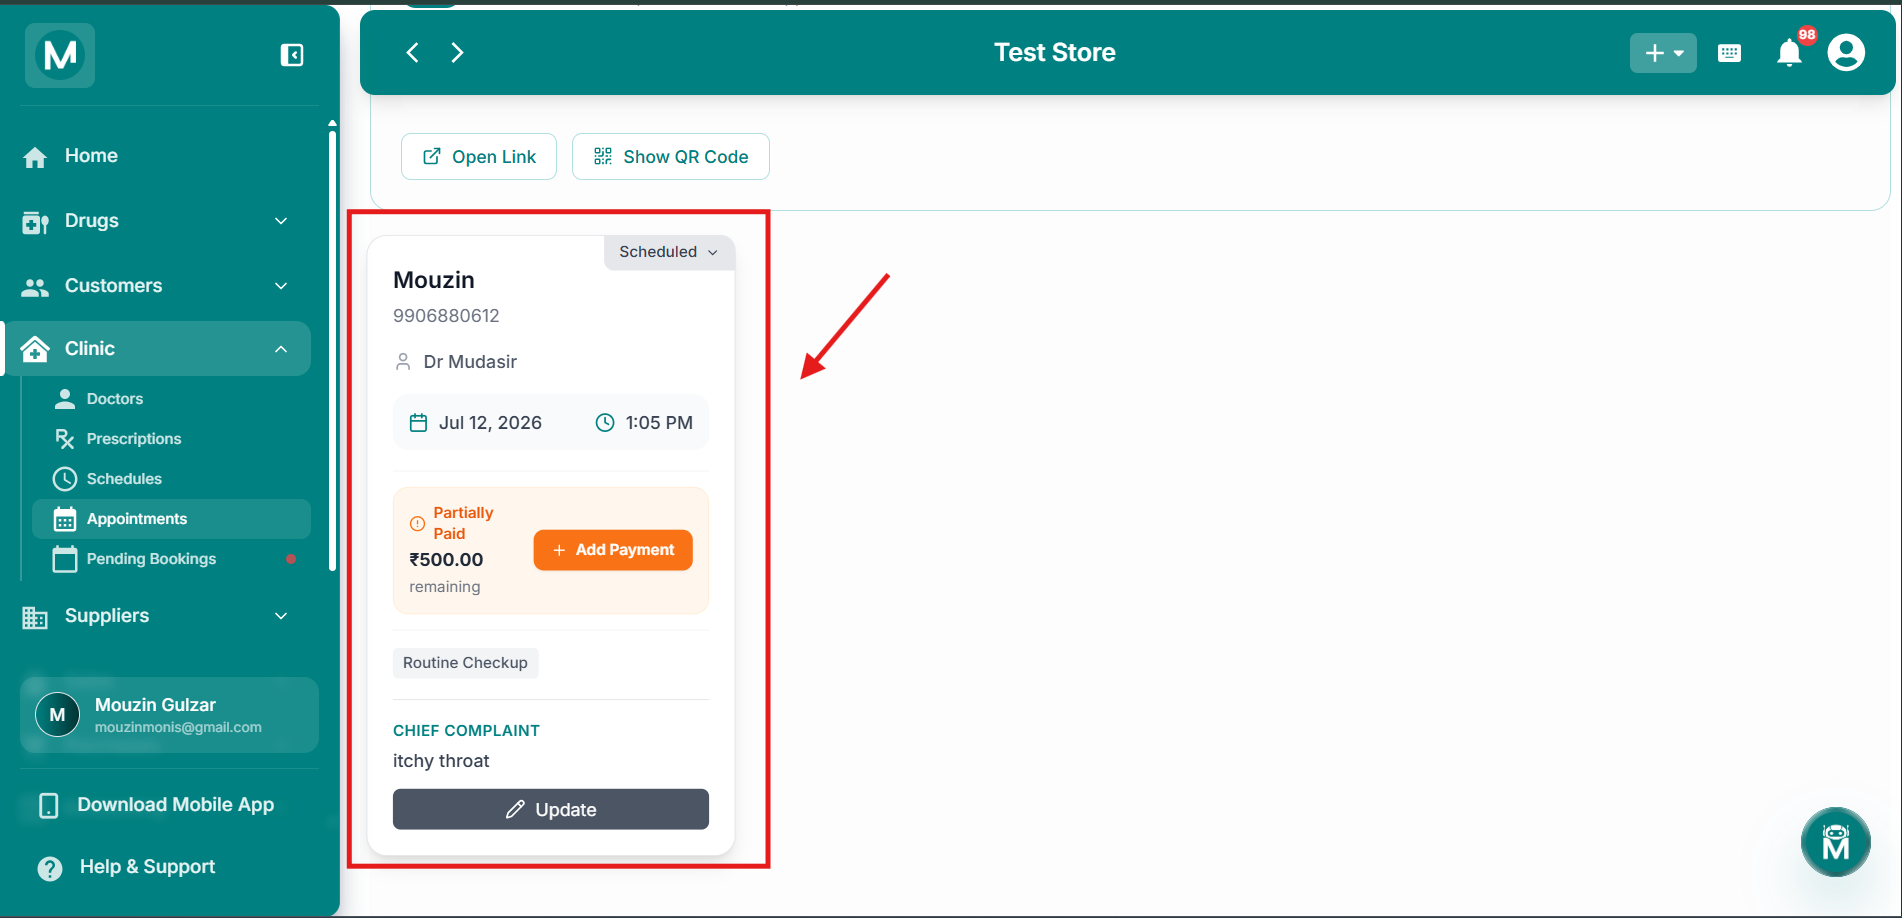
Appointment card
Appointment card showing patient details, doctor, time, status, and payment information
Updating Appointment Status
Click the status dropdown on any appointment card to change it between Scheduled, Confirmed, and Cancelled.
FAQs
Common Mistake To Avoid
Always check availability before booking
Adding an appointment without checking the doctor's actual availability first can lead to double-bookings. Always go through the Schedule → Date → Time steps rather than assuming a slot is free.