
Bank Accounts
Manage your bank accounts and view current balances.
The Bank Accounts page lets you add, manage, and view all bank accounts linked to your pharmacy. Every account you add here automatically creates a ledger under Cash & Bank → Bank Accounts in your Chart of Accounts, so every deposit, withdrawal, and transfer is tracked in your books.
From this page you can view current balances, filter by account type, set a default account for transactions, and reconcile your records against actual bank statements.
Navigate here from the sidebar: Accounting → Bank Accounts.
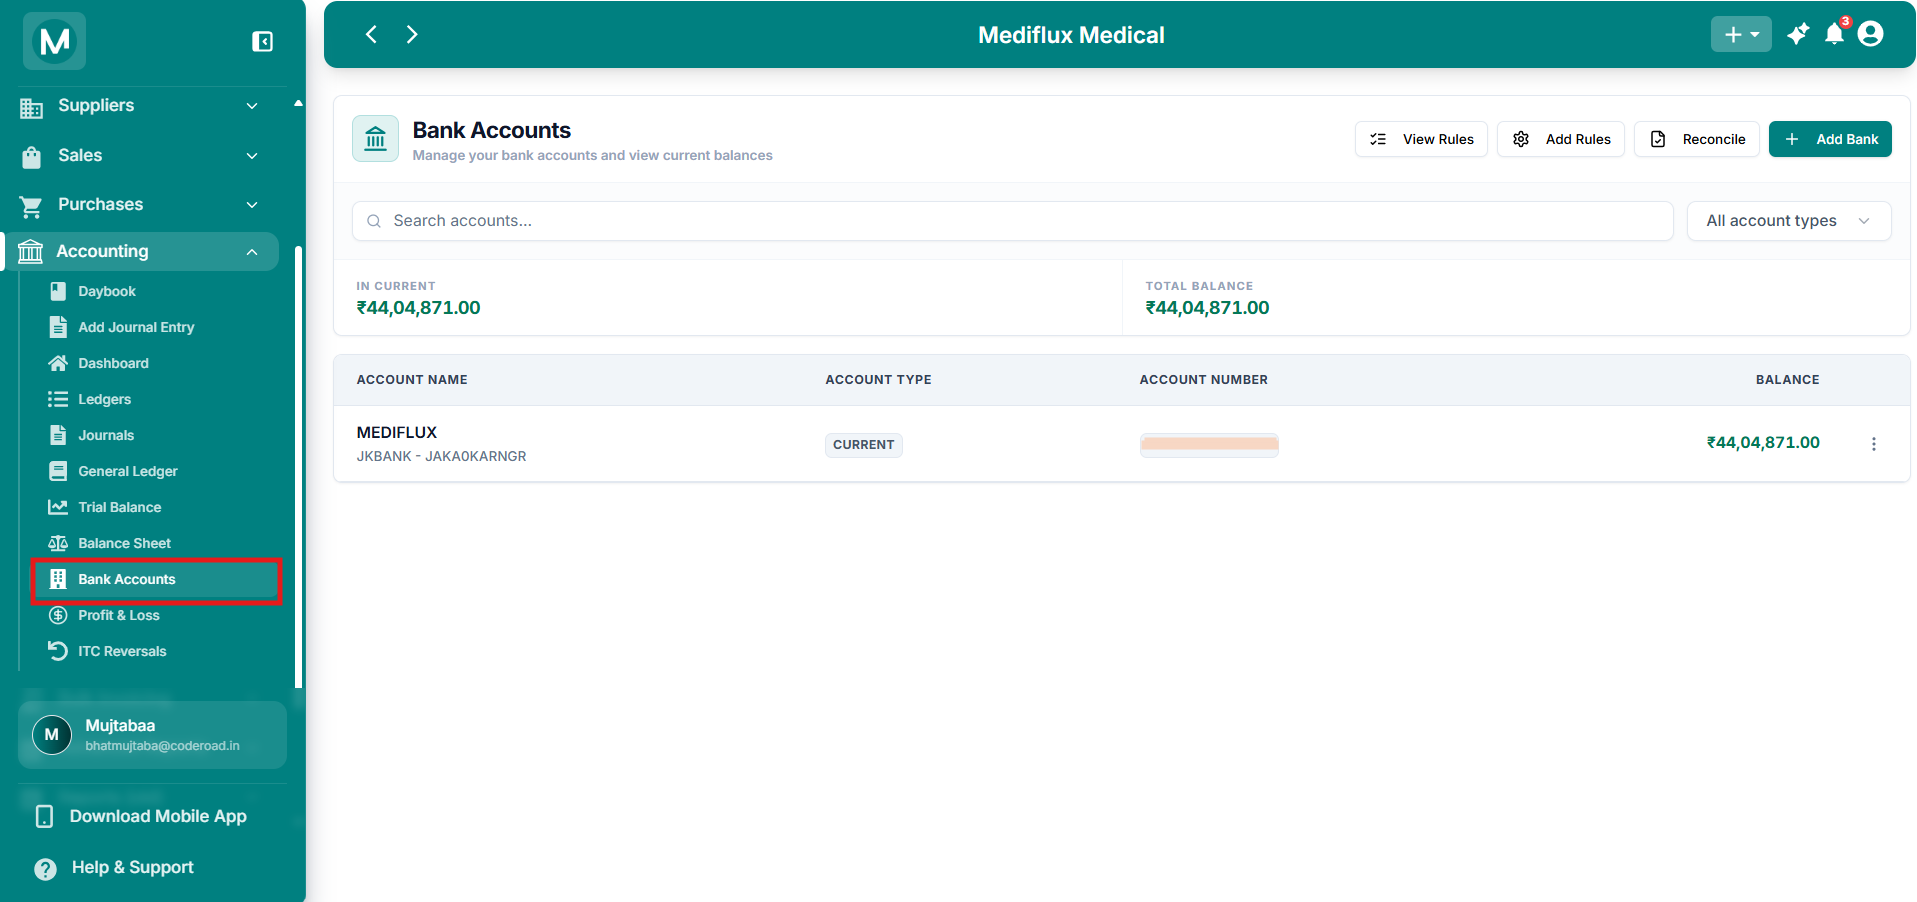
Bank Accounts overview
Manage all connected bank accounts, view balances, and access reconciliation tools.
Search and filter
Use the controls at the top to find accounts quickly.
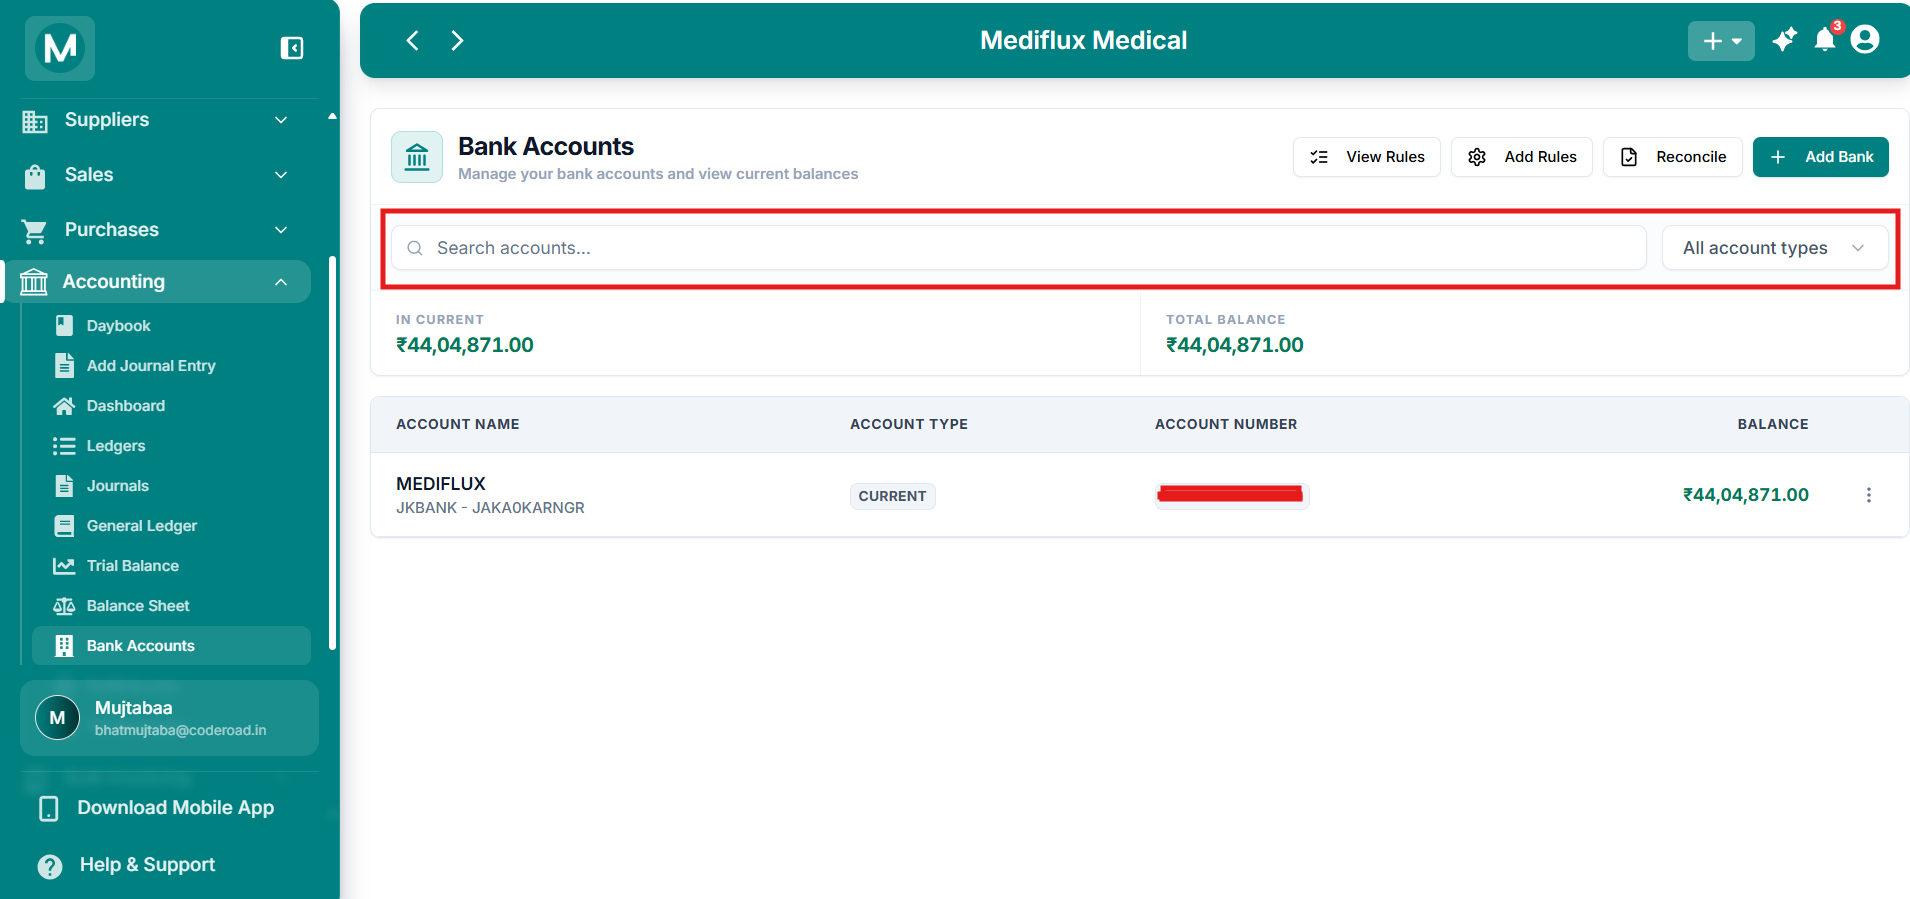
Account type filter
Show only Savings, Current, Fixed Deposit, or Recurring Deposit accounts.
Summary cards
Two cards sit above the table, giving you a quick view of your cash position:
Fixed Deposits and Recurring Deposits are not included in the In Current total because they are not immediately liquid. They are included in Total Balance.
Accounts table
Click the three-dot menu at the far right of any row to access account actions.
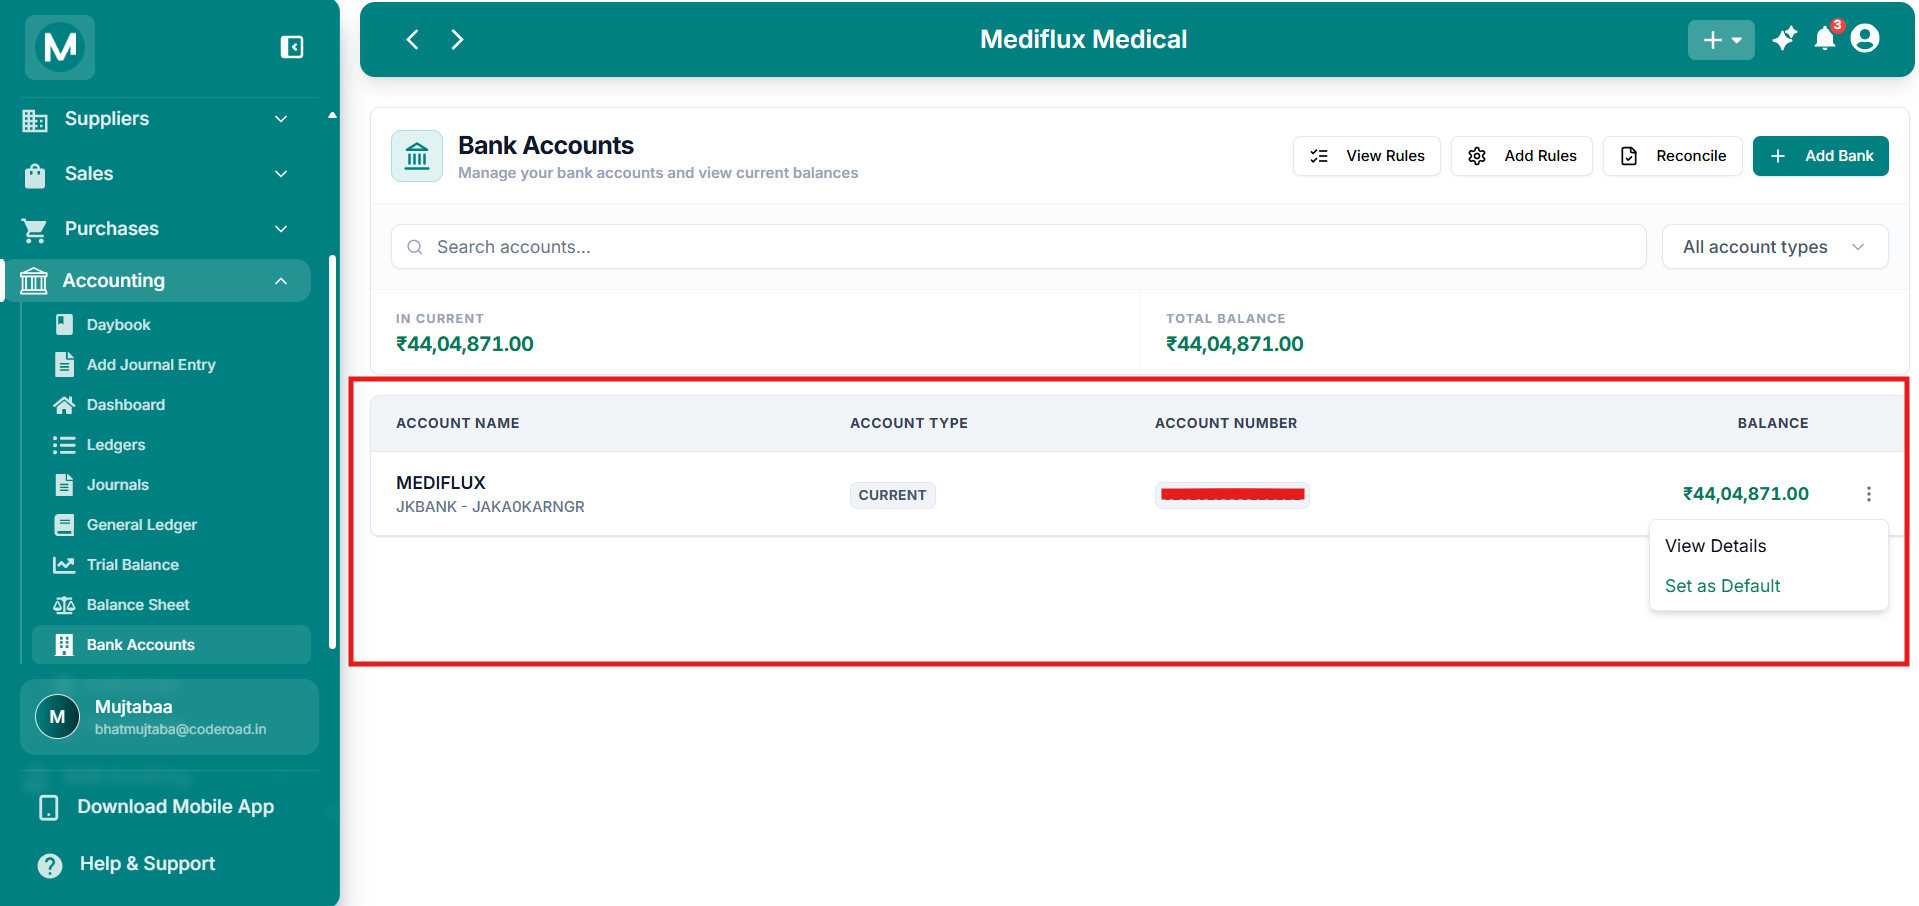
Account actions
View details or set the account as the default bank account.
Top action buttons
Four buttons sit in the top-right corner of the page:
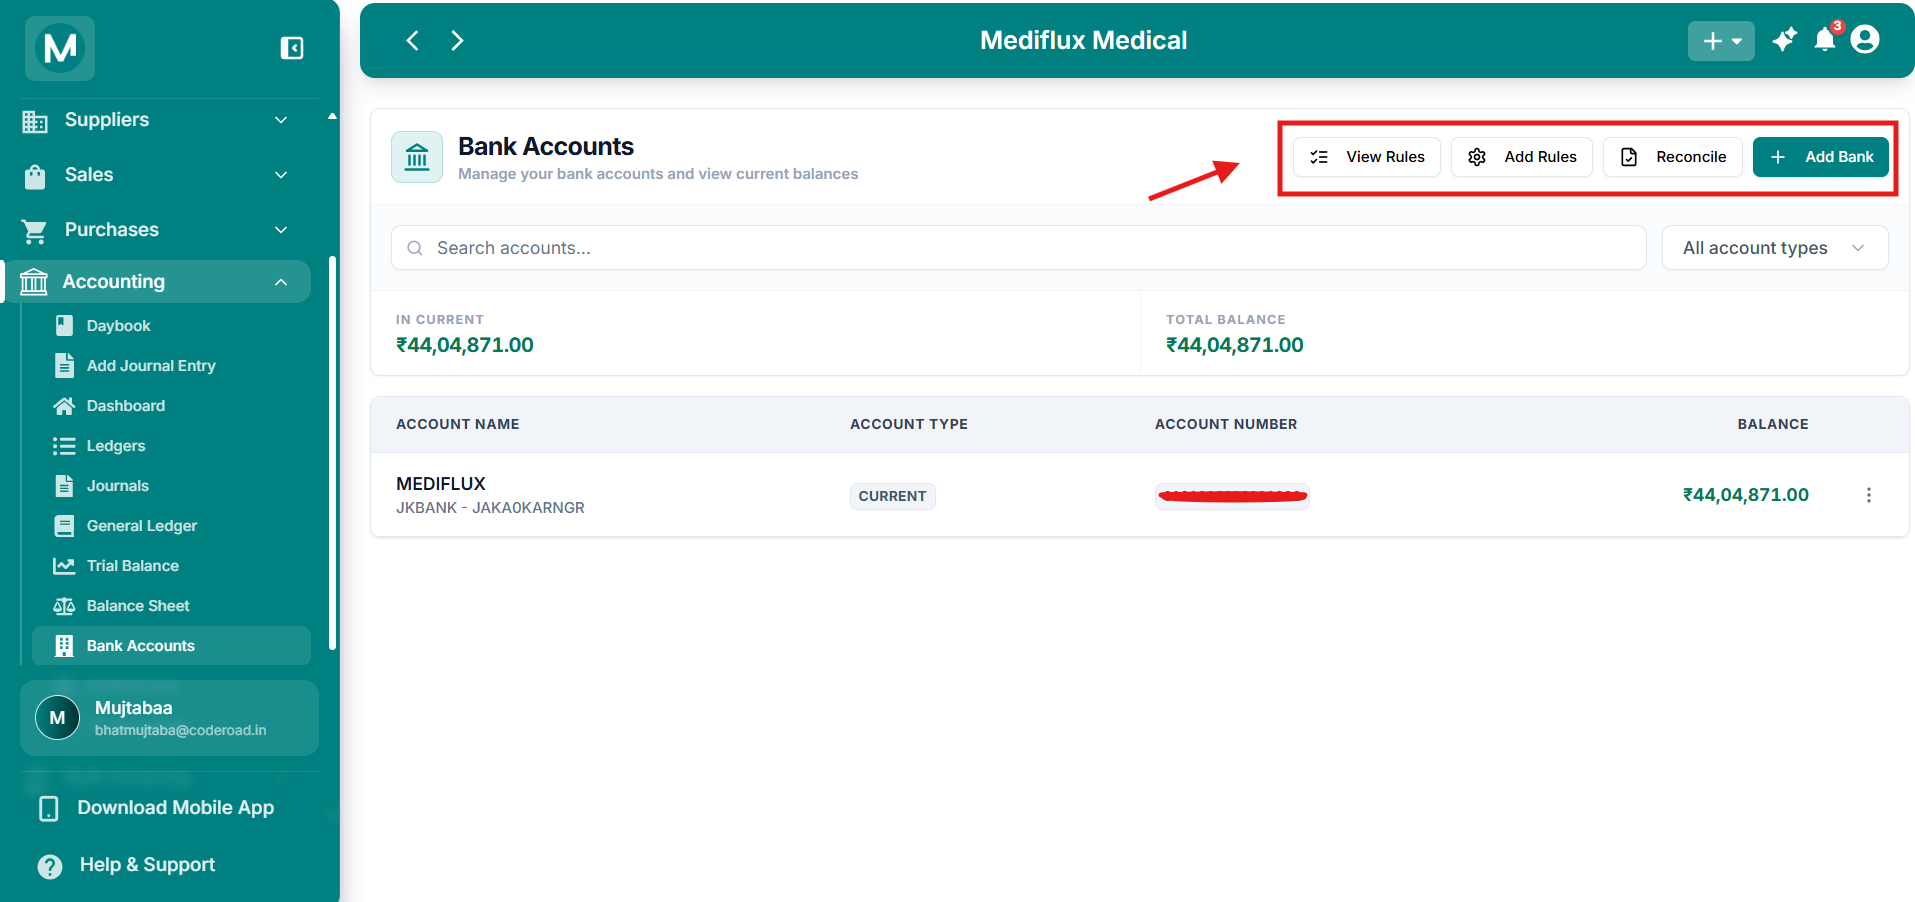
Actions Buttons
View , Set Reconciliation rules and add bank.
Add a bank account
Click Add Bank
Click Add Bank in the top-right corner.
Fill in the details
- Account Name – A friendly name (e.g. Main Business Account)
- Account Number – The full bank account number
- Bank Name – The name of the bank
- IFSC Code – The Indian Financial System Code for the branch
- Branch – The branch name
- Account Type – Select Savings, Current, Fixed Deposit, or Recurring Deposit
Set as default (optional)
Check Set as default bank account if this should be the default for new transactions.
Save
Click Add Bank Account.
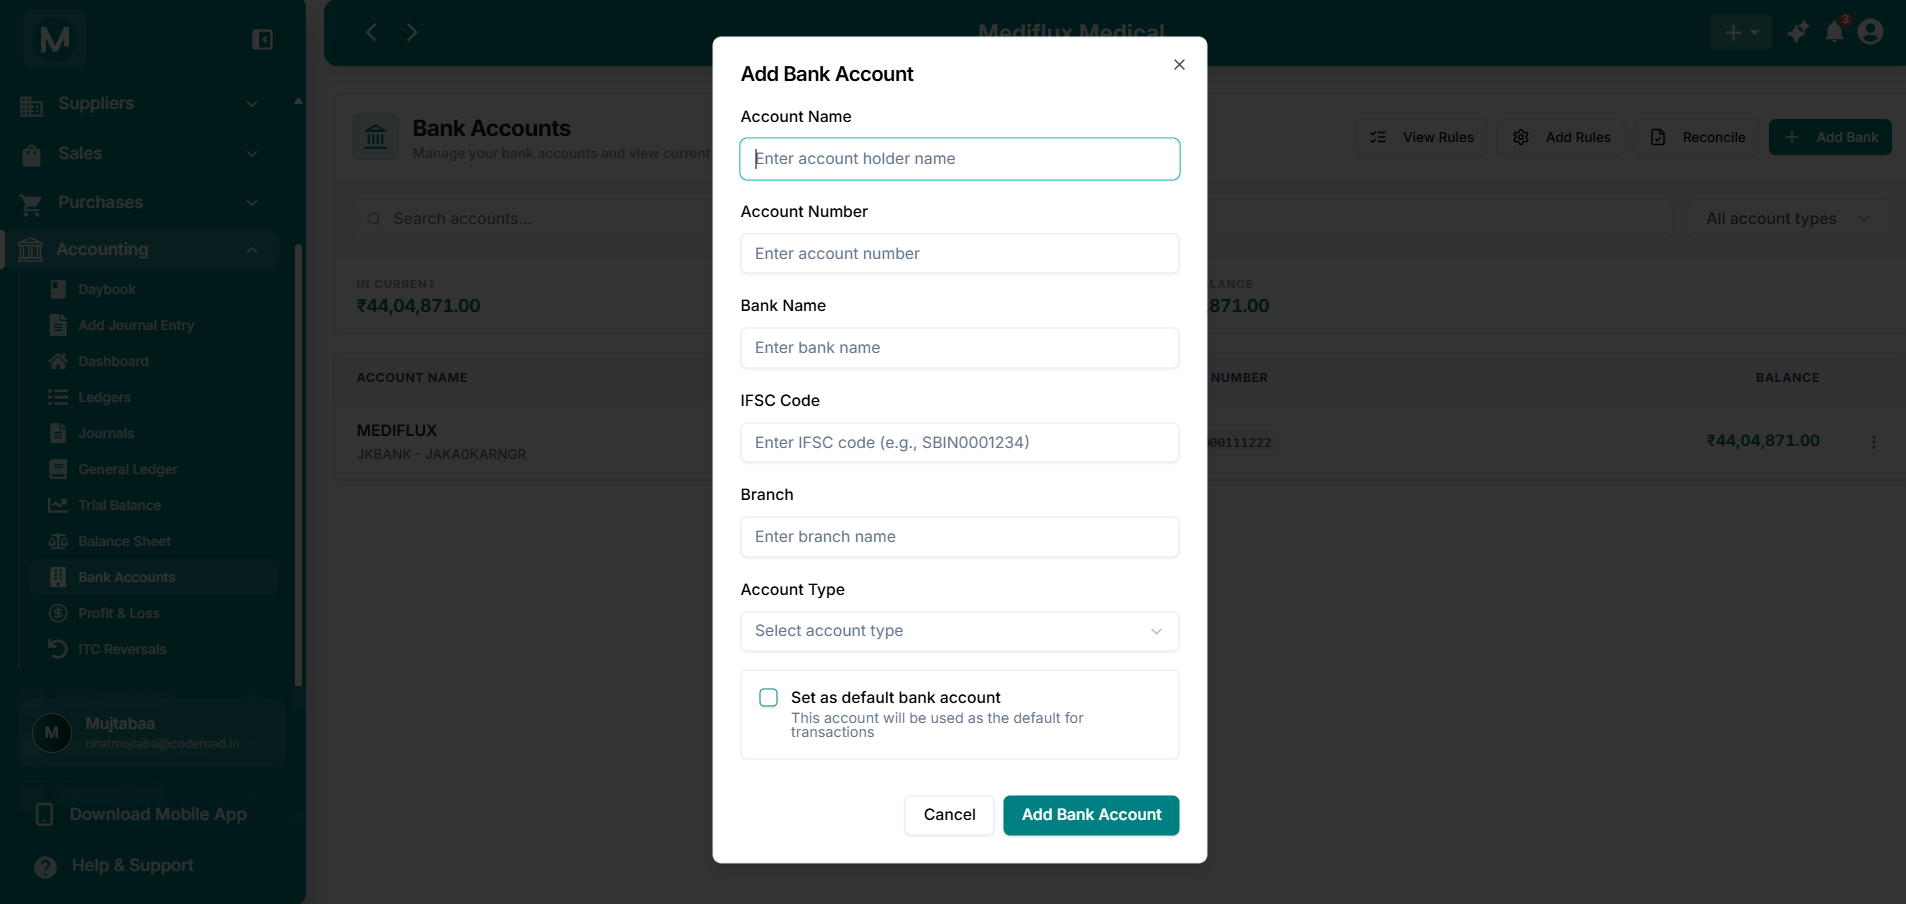
Add Bank Account
Fill in bank details to create a new account.
When you add a bank account, MediFlux automatically creates a corresponding ledger under Cash & Bank → Bank Accounts. You do not need to create the ledger manually.
Reconcile your bank account
Bank reconciliation is the process of comparing the transactions recorded in MediFlux against the transactions shown on your actual bank statement. The goal is to ensure both records agree.
Differences can happen for several reasons:
Open the Reconciliation screen
Click Reconcile on the Bank Accounts page.
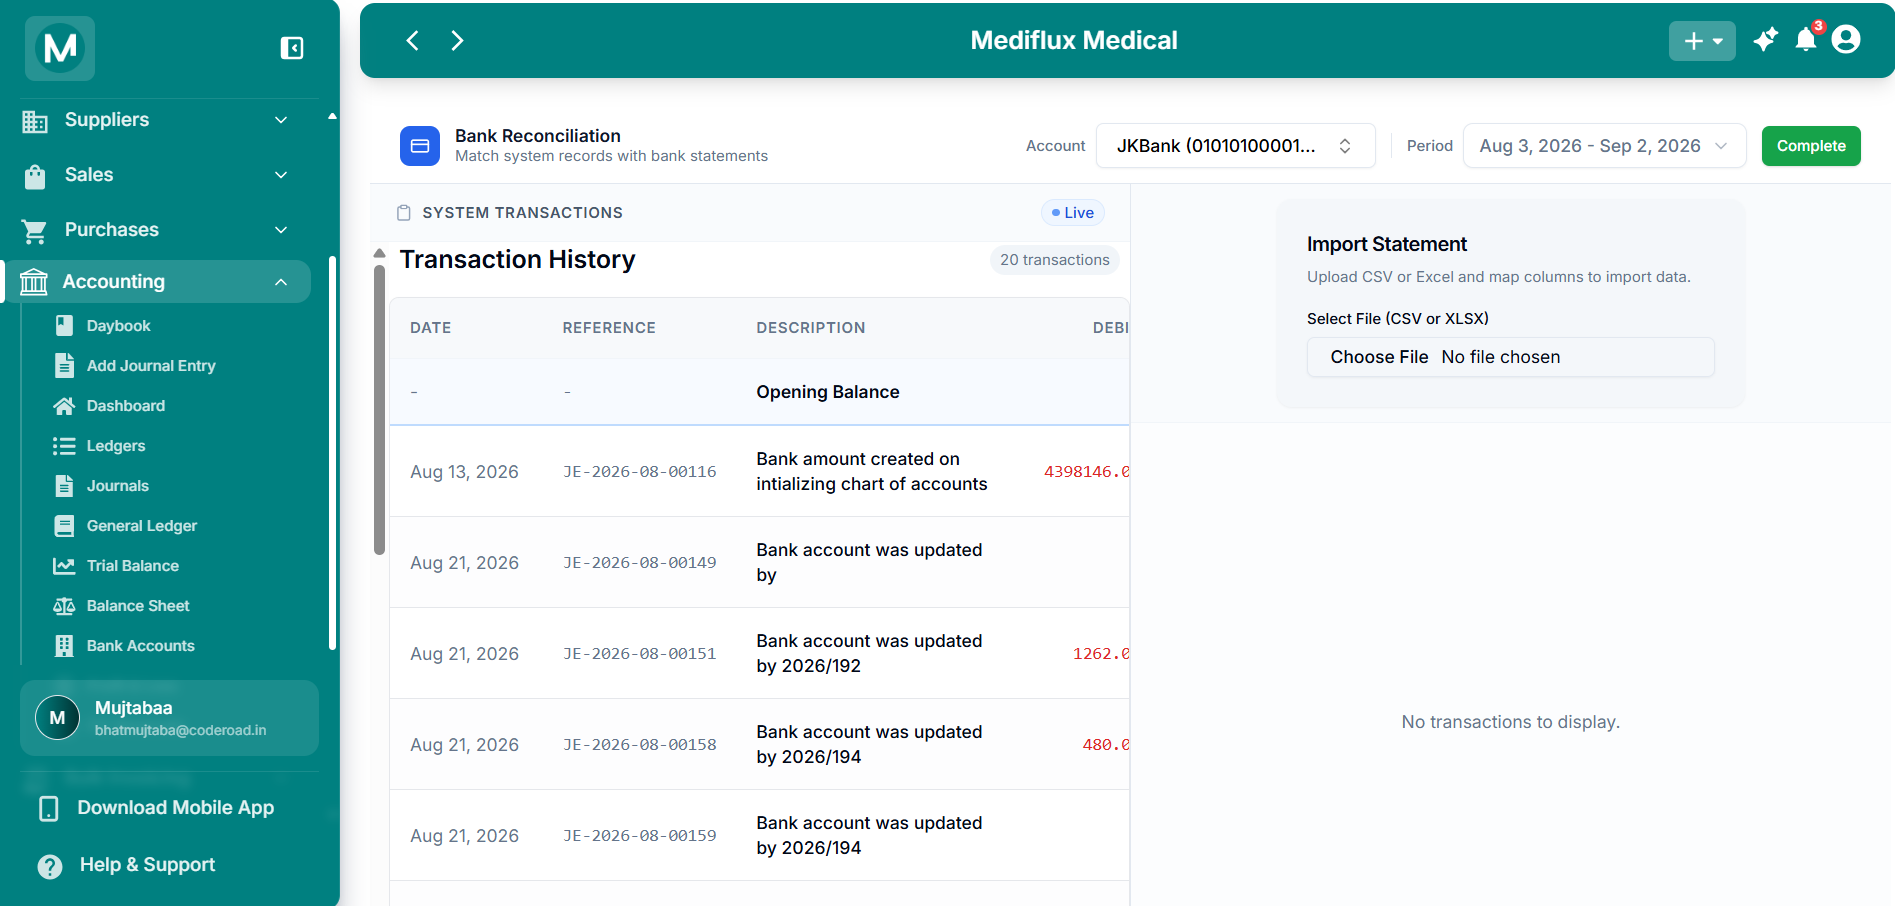
Bank Reconciliation
Match system transactions (left) with imported bank statement (right).
The screen is split into two panels:
Before you start
Select the account
Choose the Account from the dropdown at the top.
Select the period
Choose the Period that matches your bank statement.
Download the statement
Download your bank statement from your bank’s website or app and save it as CSV or Excel (XLSX).
Import your bank statement
Choose the file
In the Import Statement panel, click Choose File and select your downloaded statement.
Map the columns
Match the columns in your file to the required fields: Date, Description, Debit, Credit, and Balance.
Import
Click Import to load the statement data.
How matching works
MediFlux attempts to auto-match transactions based on amount, date, and description.
Set up reconciliation rules
Reconciliation rules automatically match recurring transactions so you do not have to do it manually every month.
Click Add Rules
Click Add Rules on the Bank Accounts page.
Fill in the rule
- Bank Account – The account this rule applies to
- Narration – A keyword or phrase from the bank statement (e.g. “Bank charges”)
- Entry Type – Debit or Credit
- Amount Type – Exact, Contains, or Any
- Amount – Optional. Enter the exact amount if you chose Exact
Save
Click Add Rule.
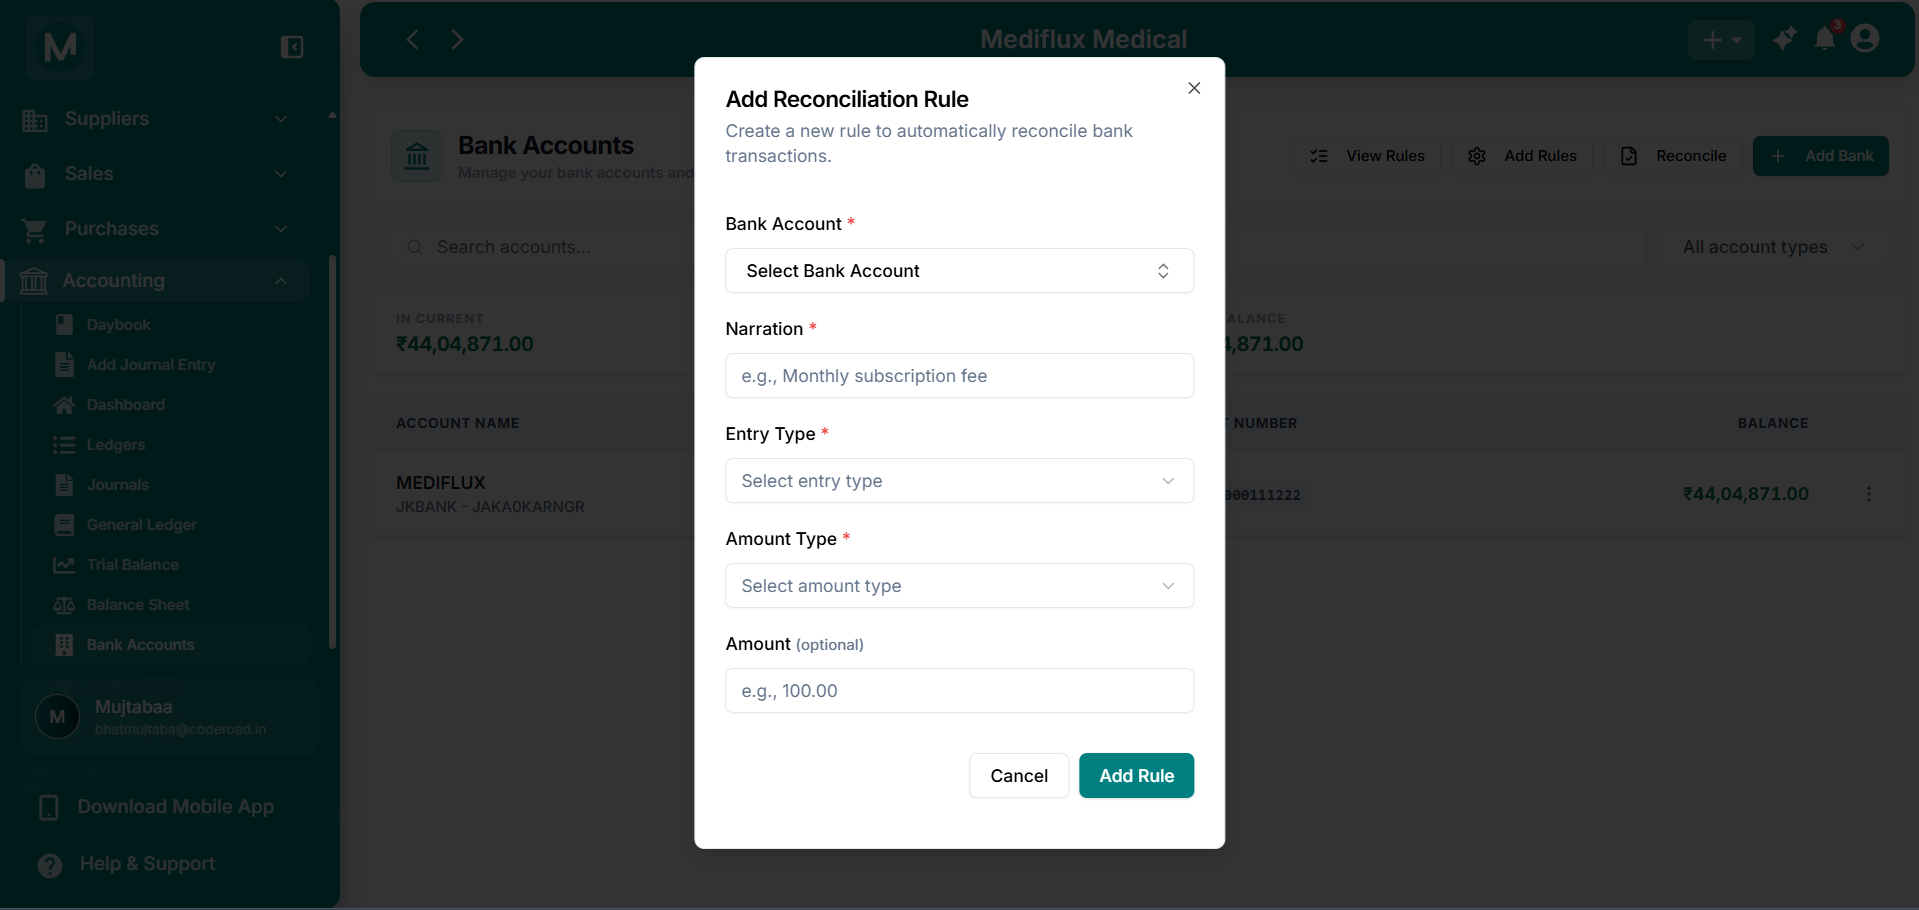
Add Reconciliation Rule
Automate matching for recurring transactions such as bank fees or EMIs.
Example: If your bank charges a fixed monthly fee of ₹500, create a rule with Narration = “Bank charges”, Entry Type = Debit, Amount Type = Exact, and Amount = 500. MediFlux will auto-match it every month.
Complete the reconciliation
Once all transactions are matched and any discrepancies are resolved, click Complete. MediFlux marks the reconciliation as done for the selected period. The bank account balance in MediFlux now matches your bank statement.
Reconcile your bank accounts at least once a month, ideally when you receive your monthly bank statement.
Common mistakes
Creating duplicate entries during reconciliation
When you see a transaction on your bank statement that is missing from MediFlux, do not create a new journal entry without checking if it already exists under a different description. Use the match function first.
Ignoring small differences
A difference of even a few rupees is usually a bank fee, interest, or rounding error. If you ignore it, your MediFlux balance will drift further from your actual bank balance every month.
Frequently asked questions
Next steps
General Ledger
View the complete transaction history for any bank account ledger.
Ledgers
Browse the Chart of Accounts and see how bank accounts fit into the structure.
Add a Journal Entry
Manually record bank fees, transfers, and other transactions.
Trial Balance
Verify that your bank account balances are reflected correctly in the overall books.